1. Create a new order
Press the New button to start a new transaction. This also discards any changes made to the order being edited.
There are two different types of transactions to choose from. Estimate or Sales Order. Changing the transaction type for existing transactions copies the transaction to a new transaction.
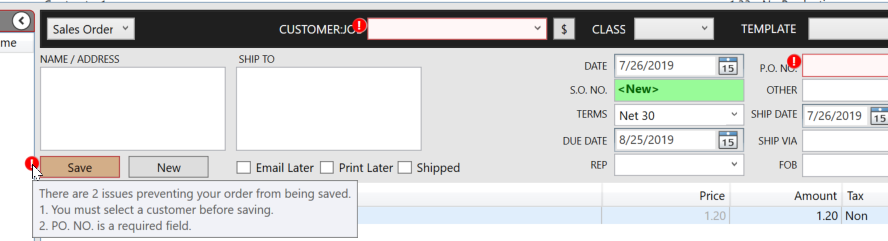
The order entry fields are similar to QuickBooks. Any of the fields can be marked as required under
Preferences (F3) > Order Entry > Company Preferences. Required fields will show an error if the user tries to save the order with out entering the required field. Required fields do not apply to estimates. Holding your mouse over the error symbol displays the error message.
The color of the save button changes to indicate the state of an order as follows:
 Tan means there are changes to the order that have not been saved yet.
  Pink means that one of the line items on the transaction have changed.
  Green means the order was saved but is still being imported to QuickBooks.
2. Adding items to the order
A. Item field
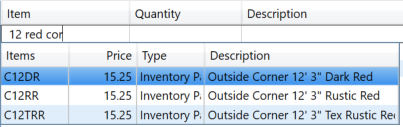
Items are entered into the item field just like in QuickBooks. The item field can also be used to search items by description. If you enter a space anywhere in the item fields the description search is triggered. Text separated by spaces are treated as different search terms.
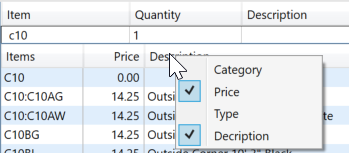
The item list columns can be resized. The list width can also be adjusted by dragging from the top right.
In addition to the item column up to four more columns can be display by right clicking on the column headers and selecting the columns to show.
Your layout preferences are preserved for future sessions.
For 'Panel' items that can be produced the item text shows gold.
B. Quantity Field
The quantity field allows you the enter the item quantity. For items that are sold by the lineal foot the Tally editor is shown. You can set up item be sold by the foot using Item Category Setup (F6).
C. Description Field
The description field is automatically populated based on the item information. You can alter the text in the description field. The description field can contain multiple lines.
For items that are sold by the lineal foot, the tally is shown below the item description. Clicking on the tally or the quantity will open the tally editor to edit the tally.
D. Price Field
The price field will turn color according to how the price was calculated.
 Gold means the price was calculated using a price rule.
  Gray means that the price is different than regular price. This happens when editing an existing order.
Hovering your mouse over the price shows information about how the price was calculated.
E. Amount Field.
The amount field shows the total amount for the line. Adjusting the amount recalculates the price. The Field Calculator can be used in the amount field.
F. Tax Field
Specifies the items tax. This is the same functionality as QuickBooks.
3. Field Calculator
The Quantity, Price, and Amount field contain a calculator to allow you to calculate amount directly in the field. A popup shows the numbers calculated. Press enter to accept the calculated value, or Esc to cancel. Simply clicking elsewhere will accept the calculated value.
4. Tally Editor
For items that are setup to sell by the lineal foot a tally editor is available to create a cut list. You can set up item be sold by the foot using Item Category Setup (F6).
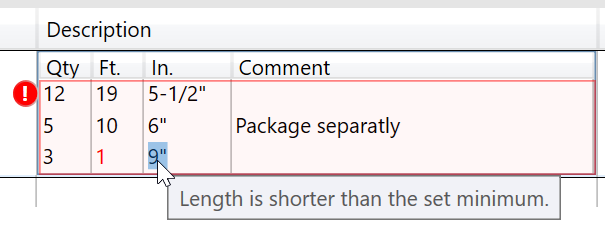
Clicking in the quantity field opens up the tally editor under the item description.
If items are short than the set minimum for the panel the text is red for the line that is too short. See Panel Setup.
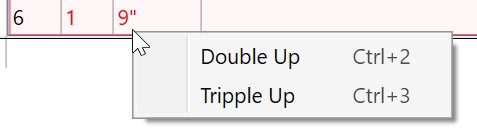
The problem can be fixed by adjusting the panels to be longer. You can also right click and choose 'Double Up', or 'Triple up' if your quantity is divisible by 2 or three.
A comment is added to remind production to cut down the panels. The comment can also be edited manually.
Panels can be sorted by length or quantity by clicking on the column headers. Individual lines can be reordered by dragging them to a new position.
The quantity field is automatically calculated as the tally list changes.