When product is set up using the
Setup Window items are not automatically created in QuickBooks.
For example: If you add a new color and start stocking it in a particular coil, there will be new items for any panels, or trims using that coil. Until those items exist in QuickBooks they can't be used on a sales order or be produced.
Setting up new items in QuickBooks can be very time consuming and error prone. For example: if you added a new coil you would need to add a new Inventory Part in QuickBooks for the new coil. You would also need to create an Inventory Assembly item for each trim, and panel that uses that coil. The amount of coil used to make the trim would need to be calculated manually.
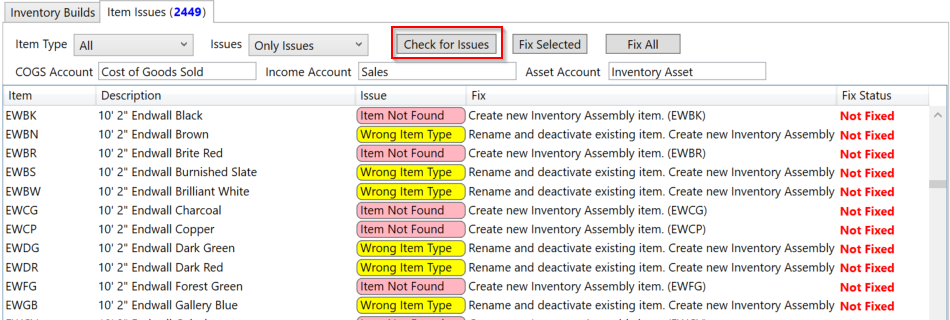
By pressing the 'Check for Issues' button, QuickBooks is automatically scanned for items that are not set up, or are set up incorrectly.
Five types of issues are checked for and can automatically be corrected.
The 'Fix' column shows the action that will be taken to correct the issue.
1. Item Not Found
The item is not in QuickBooks, and needs to be created.
2. Wrong Item Type
The item exists in QuickBooks but is the wrong type. For example the existing item might be an Inventory Part, and needs to be an Inventory Assembly. In order to correct this the old item needs to be renamed and made inactive. Then a new item can be created. Renamed items are the original item with (OLD) added to the end.
3. Wrong Components
The Inventory Assembly item exists in QuickBooks, but the items used to produce it are either the wrong items or quantities. The item is modified to correct this issue.
4. Lowercase Item
Items are expected to be uppercase (CAPITAL LETTERS). If the item is setup with lowercase characters it is renamed so it matched the product codes in QB Metal Shop.
5. Item Inactive
The item is set to Inactive In QuickBooks. The item will be activated.
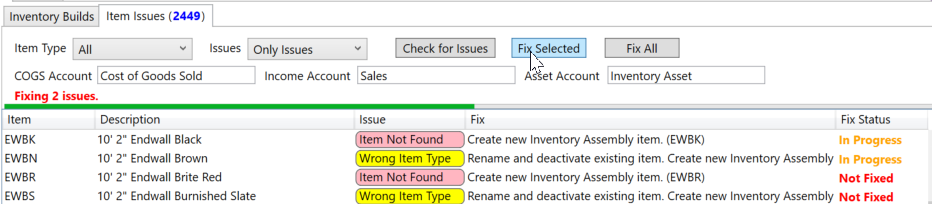
After checking for issues there are two ways to resolve the issues.
NOTE: Before attempting to fix issues you must set the default accounts to use for setting up the new items.
1. Select the individual items to correct and press the 'Fix Selected' button.
2. Pressing the 'Fix All' button will attempt to fix all current issues.
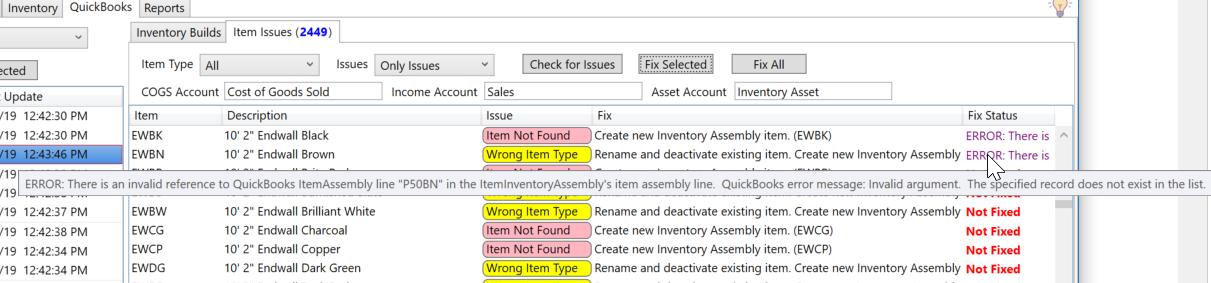
If the fix is unsuccessful, the Fix Status column will report the error with information about the problem.